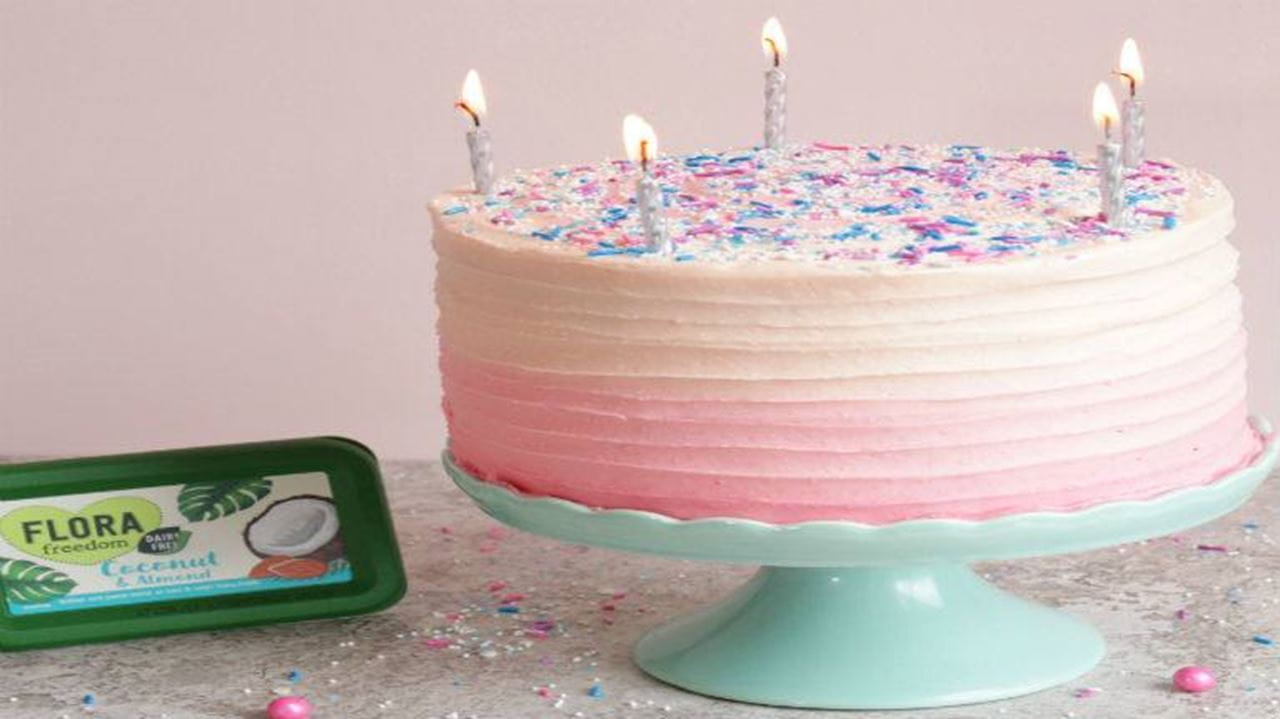
Pink Ombre Coconut Cake
Having a party? Impress your guests with this beautiful pink coconut ombre cake, perfect light sponge and packed full of coconut flavour. Everybody will love it for that special occasion!
Having a party? Impress your guests with this beautiful pink ombre coconut cake, perfect light sponge and packed full of coconut flavour. Read more.
 Cooking Time
1 hour 30 minutes
Cooking Time
1 hour 30 minutes Prep Time1 hour 30 minutes
 DifficultyEasy
 Servings20
- - Sponge -
- 335 g Flora Original
- 330 g caster sugar
- 6 eggs
- 340 g self-raising flour
- 1 1/2 tsp baking soda
- pinch of salt
- - Vanilla Buttercream -
- 800 g icing sugar
- 400 g soft unsalted butter
- 2 tbsp vanilla extract
- 3 tbsp semi-skimmed milk
- - Sugar Syrup -
- 50 g water
- 50 g sugar
- pink food colouring
- Start by lining 3x8” cake tins.
- Add the eggs to a mixing bowl along with the remaining sponge ingredients. Beat with a wooden spoon or an electric mixer until everything is combined.
- Split the batter evenly between the three cake tins and bake for 25-30m at 180C.
- Once cooked, allow the cakes to cool for 30m, then place them in the fridge for another hour.
- To make the frosting, beat the soft butter for 5 minutes. Add ½ of the icing sugar and beat again for another 3-4m until the mixture is light and fluffy.
- Add the remaining icing sugar, along with the milk & vanilla and beat for another 2 minutes.
- Split the frosting into 4 bowls. In three bowls, add pink food coloring, making each bowl slightly darker than the next so that you have a light pink, medium pink and a dark pink. Leave one bowl of frosting white.
- Just before decorating the cake, make a quick sugar syrup. Add the water and sugar to a pan and place on a medium heat until it has all dissolved.
- Once the frosting is ready and the cake has completely cooled, place one cake down onto an 8” cake board using a tiny bit of buttercream. Use a pastry brush to add a light coating of sugar syrup to the top of the cake. Next take a dollop of white buttercream and spread thinly evenly to the edges of the cake. Repeat the process, placing your second layer of cake on top, adding the sugar syrup and then the frosting. Finally add the third layer of cake on top.
- Add a few dollops of white buttercream around the edge of the cake, and smooth it out covering the whole cake in a thin light crumb coat. Place the cake in the fridge for 20m.
- Place your darkest shade of pink buttercream into a piping bag fitted with a 1M tip. In a swirl motion, pipe counter clockwise to create a rose design that covers the lower third of the cake. Pipe roses all around the base until it is completely covered in the darkest shade.
- Repeat the process, using the medium shade of pink for the next row of roses, and finally cover the top third of the cake with the lightest shade of pink.
- For the top of the cake, start with the lightest shade of pink and work your way towards the middle finishing with the darkest shade.
- Enjoy!


Our Products


